SSH key pairs can be used for secure login to Linux server with out prompting for password.
Puttygen is a very useful key generator which can be used to generate key pairs for login to Linux node on cloud or on premise using putty utility. It uses the private key in ppk format to login to Linux node
About SSH Key pair
SSH Key pair consists of two parts
1.Public key and Private key
2.Public key is used when creating the instance and Private keys are stored on your system from where you will connect to cloud
How to download and install puttygen
Puttygen can be download from below site
You can either download the MSI installation for installing all the putty utlities or the individual one (alternatives binary files)
If you have a 64-bit computer, it is recommended that you install the 64-bit version putty-64bit-<version>-installer.msi
If you have chosen alternatives binary files, there is no installation , we can click the file and utility will start. If you have downloaded the msi one ,then run the .msi as administrator for the installation. It will install all the putty utilities in specified location
Generating an SSH Key Pair on Windows Using the PuTTY Key Generator
Step 1
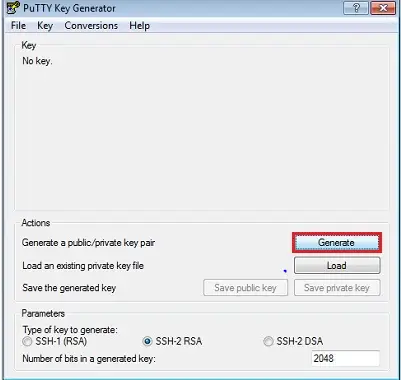
a.Find puttygen.exe in the PuTTY folder on your computer and double-click it.
b.Accept the default key type, SSH-2 RSA,and set the Number of bits in a generated key to 2048, if it is not already set. Then click
a.Find puttygen.exe in the PuTTY folder on your computer and double-click it.
b.Accept the default key type, SSH-2 RSA,and set the Number of bits in a generated key to 2048, if it is not already set. Then click
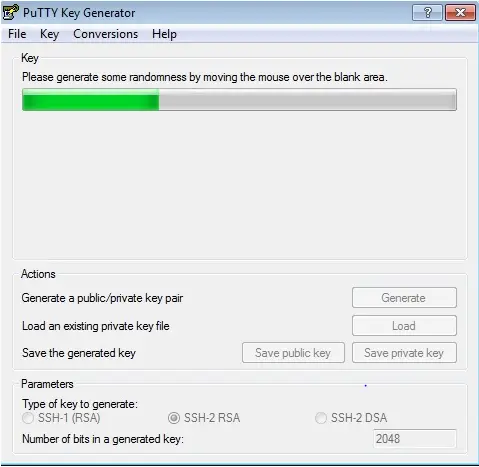
Step 2
Move your mouse around the blank area to generate randomness. The SSH key pair will take mouse movement to generate randomness
Step 3
SSH key pair will be generated and you will be presented with below screen
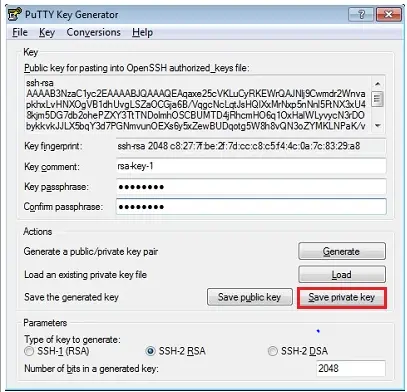
First enter the below field to identify the keys
- The key comment is the name of the key. You can keep the generated key comment or create your own. For example rsa-key-1
- Enter a passphrase in the Key passphrase and the Confirm passphrase
Note: Remember the passphrase. You can’t recover a passphrase if you forget it.
Save your private key using the below steps
a. click Save private key. This saves the private keys in PuTTY PPK format,
b. Enter the same name as you used for the key comment so that you know which public key to use this private key with.
b. Enter the same name as you used for the key comment so that you know which public key to use this private key with.
About PPK format
PuTTY’s Private Key (PPK) format is a proprietary format that works only with the PuTTY tool set. You can use this key whenever you use PuTTY for SSH.
Step 4
Save your public key using the below steps
a. select all of the characters in the Public key
Note: Make sure you select all the characters, not just the ones you can see in the narrow window. If there is a scroll bar next to the characters, you aren’t seeing all the characters.
b. Right-click somewhere in the selected text and select Copy from the menu.
c. Open notepad or any text editor and paste the characters. Ensure that you paste the text at the first character in the text editor, and don’t insert any line breaks.
d. Save the key using the same root name that you used for the private key. Add a .pub extension. You can give it any extension you want, but .pub is a useful convention to indicate that this is a public key.
Step 5
Exit PuTTY Key Generator.
Step 6
Write down the location of public and private key names and where they are saved.
Now we can use these key pair to login to Linux node on the Cloud infrastructure. We will need to upload the public key of the pair to cloud box and setup putty to use the private key for enabling the secure password less connection from your window system to cloud machine


0 comments:
Post a Comment