
In this tutorial, we will learn about PHP mail and how to use it. We’ll also show you how to configure and use PHPMailer — a popular mail sending library.
Overall, email is an integral part of any project or business. Nowadays, being quick and responsive is a huge value, especially when it comes to answering your customers. In a lot of cases, responsiveness and well-planned communication are the deciding factors that users take into consideration when making purchases.
While there are numerous ways to deliver mails, we’ll be looking into PHP mail specifically. At the very core, you can send emails via PHP in two ways:
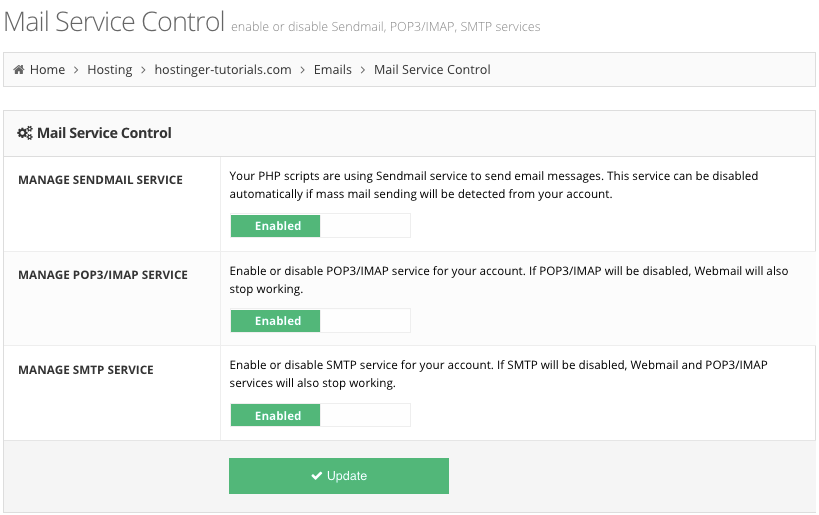
 The sendmail service is enabled by default. But in case it’s not, you can do it in just a few clicks.
The
first two lines enable error reporting. This will let help in case the
script fails to execute. The remaining ingredients are:
For more information about sendmail and its components, you can refer to the official PHP documentation.
 Here’s an example of the received PHP mail using the above code:
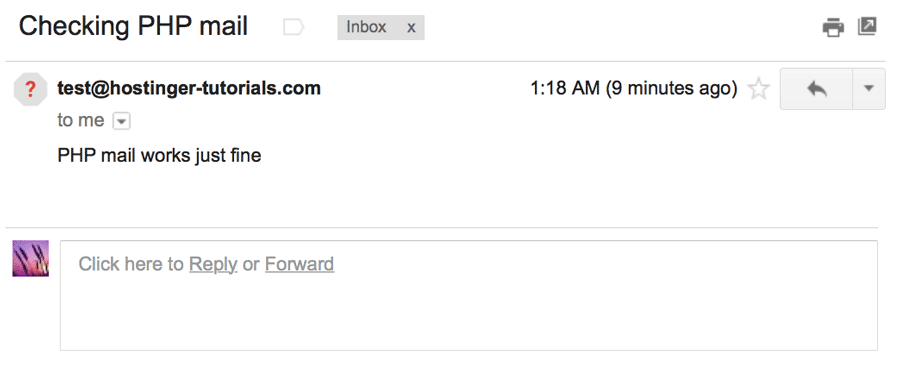 Congratulations! You now understand the basic syntax of PHP mail and can use it to send messages.
 Once you’re done, grab your SMTP details located in the same section:
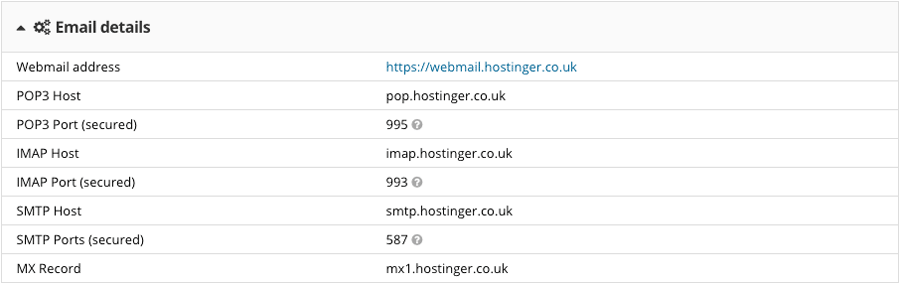
You should have four ingredients by now, which are:
Let’s see what each component does:
 Here’s an example of the received email message:
 Notice
how the text is formatted this time, as we used HTML instead of
plain-text. Furthermore, we were able to add a file attachment.
Notice
how the text is formatted this time, as we used HTML instead of
plain-text. Furthermore, we were able to add a file attachment.
And the end result is:
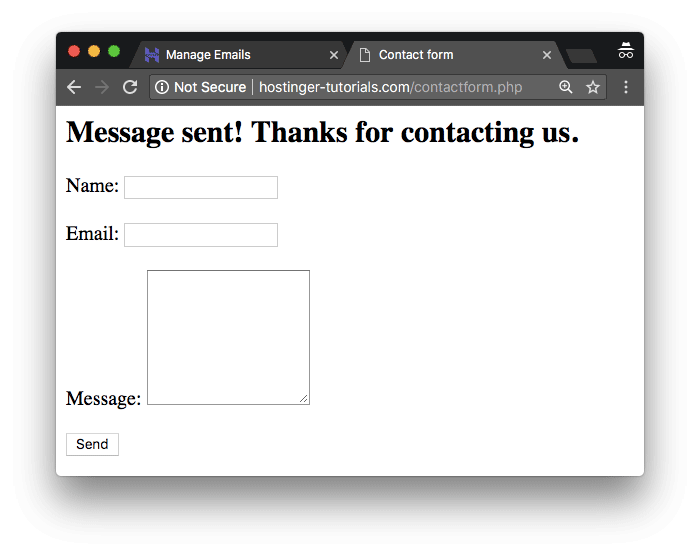 Once the user submit his message, he will get a confirmation and the contents will arrive at the e-mail box entered in the addAddress field.
Overall, email is an integral part of any project or business. Nowadays, being quick and responsive is a huge value, especially when it comes to answering your customers. In a lot of cases, responsiveness and well-planned communication are the deciding factors that users take into consideration when making purchases.
While there are numerous ways to deliver mails, we’ll be looking into PHP mail specifically. At the very core, you can send emails via PHP in two ways:
- by using PHP’s inbuilt mail() function;
- by using a third-party library such as PHPMailer with SMTP.
What you’ll need
Before you begin this guide you’ll need the following:- A web hosting account;
- An email account;
- PHP mail() function enabled;
- SMTP function enabled.
- Domain pointed to Hostinger MX records
Method 1 — Using PHP mail() function
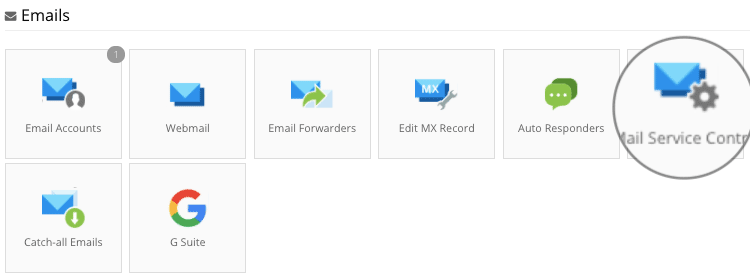
The mail() function in PHP allows sending email using a local sendmail program. Whenever you call the mail() function, it invokes a local sendmail program, usually configured by the system administrator. If your web hosting is at Hostinger, you can enable/disable this functionality in Emails -> Mail Service Control section.The sendmail service is enabled by default. But in case it’s not, you can do it in just a few clicks.Step 1 — Creating a test file for PHP mail
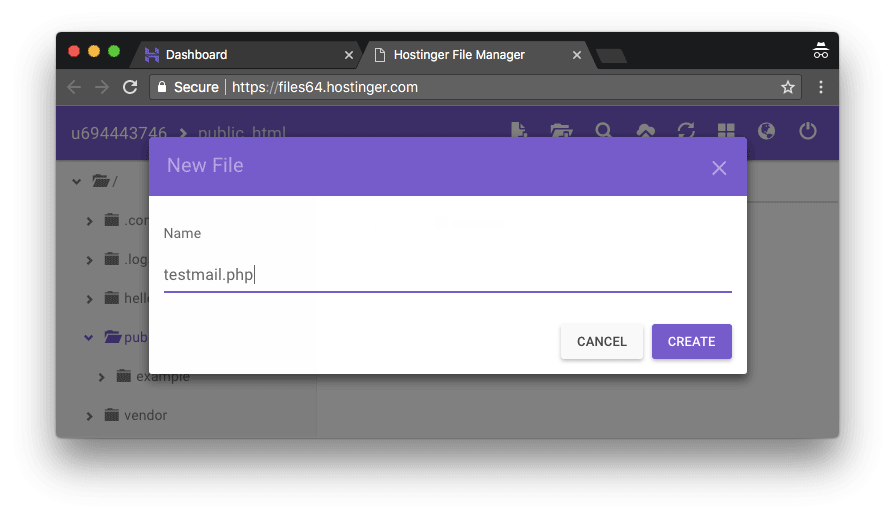
First of all, we will need to create a file for the PHP mail script. We’ll place it in the public_html directory so that it could be easily accessed through the domain name. You may use the File Manager or an FTP client for this task. Let’s name the file testmail.php.Step 2 — Understanding PHP mail
Let’s introduce ourselves with the components of a basic PHP mail script:- <?php
- ini_set( 'display_errors', 1 );
- error_reporting( E_ALL );
- $from = "test@hostinger-tutorials.com";
- $to = "test@gmail.com";
- $subject = "Checking PHP mail";
- $message = "PHP mail works just fine";
- $headers = "From:" . $from;
- mail($to,$subject,$message, $headers);
- echo "The email message was sent.";
- ?>
| $from | Email sender address. Most hosting providers do not allow using random email addresses here, as it can be used for spoofing. You should enter an email address created for your domain name to successfully execute the PHP mail. |
| $to | The recipient email address. As we are sending this for testing purposes it can be a personal email. |
| $subject | The subject of the email message. |
| $message | This section is for the message content. |
| $headers | Headers specify vital information, such as the sender address, the reply-to location and more. |
| mail ($to,$subject,$message,$headers) | This is the function that executes PHP mail. |
| echo “The PHP mail was went successfully.” | The following message will appear once the script executes. |
Step 3 — Running the PHP mail script
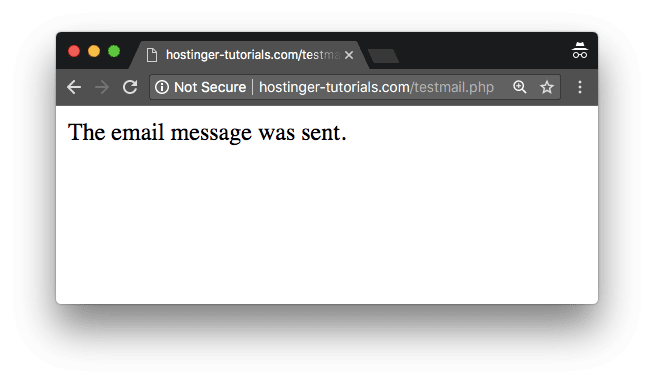
If you placed your PHP script in the public_html directory, you can it run by accessing YourDomain.com/testmail.php. You should see the following message:Here’s an example of the received PHP mail using the above code:Congratulations! You now understand the basic syntax of PHP mail and can use it to send messages.Method 2 — Using PHPMailer
PHPMailer is a popular mail sending library for PHP. It supports mail sending via mail() function or SMTP. In short, PHPMailer is an effective method to send emails in a PHP based environment.Step 1 — Gathering details for PHPMailer
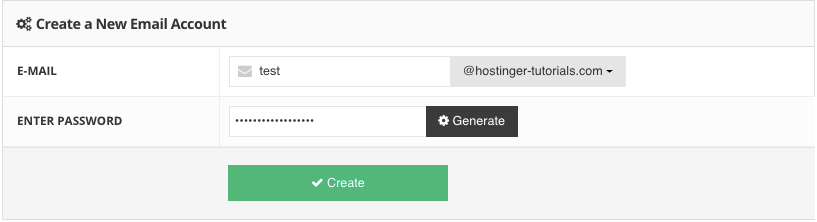
To use PHPMailer with Hostinger SMTP, you will first need to create an email account. You can do this at Email Account section in the web hosting panel.Once you’re done, grab your SMTP details located in the same section:You should have four ingredients by now, which are:
- Email account username
- Email account password
- SMTP host
- SMTP port
Step 2 — Installing PHPMailer
Since we have all the required details, we can begin the PHPMailer setup. One easy way to do it is by using Composer. It’s pre-installed on our shared hosting plans, so you’ll only need to connect via SSH and execute the following command:cd public_htmlAnd then run:
composer require phpmailer/phpmailerWait a few moments for the installation to finish and PHPMailer will appear in a newly created vendor directory.
Step 3 — Understanding PHPMailer
To understand PHPMailer and how it works let’s investigate an example that uses SMTP for delivery.- <?php
- use PHPMailer\PHPMailer\PHPMailer;
- require '../vendor/autoload.php';
- $mail = new PHPMailer;
- $mail->isSMTP();
- $mail->SMTPDebug = 2;
- $mail->Host = 'smtp.hostinger.com';
- $mail->Port = 587;
- $mail->SMTPAuth = true;
- $mail->Username = 'test@hostinger-tutorials.com';
- $mail->Password = 'EMAIL_ACCOUNT_PASSWORD';
- $mail->setFrom('test@hostinger-tutorials.com', 'Your Name');
- $mail->addReplyTo('reply-box@hostinger-tutorials.com', 'Your Name');
- $mail->addAddress('example@gmail.com', 'Receiver Name');
- $mail->Subject = 'PHPMailer SMTP message';
- $mail->msgHTML(file_get_contents('message.html'), __DIR__);
- $mail->AltBody = 'This is a plain text message body';
- $mail->addAttachment('test.txt');
- if (!$mail->send()) {
- echo 'Mailer Error: ' . $mail->ErrorInfo;
- } else {
- echo 'Message sent!';
- }
- ?>
| use PHPMailer\PHPMailer\PHPMailer; | This line imports the PHPMailer class to the global namespace. |
| require ‘../vendor/autoload.php’; | Includes various libraries that PHPMailer needs. |
| $mail-> | All these variables contain vital information, such as server details, headers, message, attachments and more. In short, they ensure that the sender is legit with SMTP authentication. |
| if (!$mail->send()) { | Defines what happens when the scripts execute. |
| echo ‘Mailer Error: ‘ . $mail->ErrorInfo; | If the script fails to send, you will see what went wrong. |
| else | Defines what happens if the script does execute. |
| echo ‘Message sent!’; | This message will appear to the user if everything works. |
Pro Tip: The line SMTPDebug = 2; is useful when testing the script and seeing how it works.
Set it to SMTPDebug = 0; in the final version to avoid the end user from seeing the SMTP delivery report.
If
you checked the whole code, you will notice that we are doing something
a little different than in the first example. We are sending an HTML
message. Its content will be taken from the message.html file
located in the same directory. This lets you format the text and gives
greater functionality compared to plain text messages.Set it to SMTPDebug = 0; in the final version to avoid the end user from seeing the SMTP delivery report.
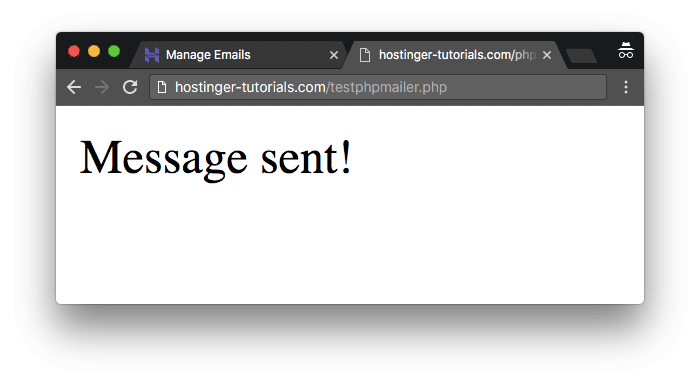
Step 4 — Running the PHPMailer script
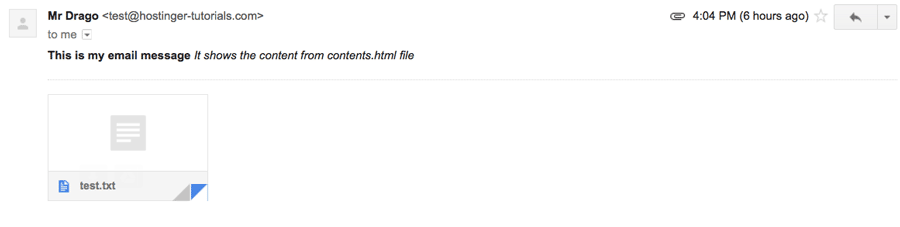
Lets create a testphpmailer.php file and fill in all the fields with the SMTP details we retrieved earlier. Execute the script by entering YourDomain.com/testphpmailer.php in the browser and you will see a similar message:Here’s an example of the received email message:Notice
how the text is formatted this time, as we used HTML instead of
plain-text. Furthermore, we were able to add a file attachment.Step 5 — PHPMailer contact form example
You can use PHPMailer for much more than just sending out simple messages. One way you can utilize it is to create a contact form where your visitors or users can get in touch with you. Here’s a basic example of such script:- <?php
- use PHPMailer\PHPMailer\PHPMailer;
- require '../vendor/autoload.php';
- $mail = new PHPMailer;
- $mail->isSMTP();
- $mail->Host = 'smtp.hostinger.com';
- $mail->Port = 587;
- $mail->SMTPAuth = true;
- $mail->Username = 'test@hostinger-tutorials.com';
- $mail->Password = 'EMAIL_ACCOUNT_PASSWORD';
- $mail->setFrom('test@hostinger-tutorials.com', 'Mr. Drago');
- $mail->addAddress('example@gmail.com', 'Receiver Name');
- if ($mail->addReplyTo($_POST['email'], $_POST['name'])) {
- $mail->Subject = 'PHPMailer contact form';
- $mail->isHTML(false);
- $mail->Body = <<<EOT
- Email: {$_POST['email']}
- Name: {$_POST['name']}
- Message: {$_POST['message']}
- EOT;
- if (!$mail->send()) {
- $msg = 'Sorry, something went wrong. Please try again later.';
- } else {
- $msg = 'Message sent! Thanks for contacting us.';
- }
- } else {
- $msg = 'Invalid email address, message ignored.';
- }
- ?>
- <!DOCTYPE html>
- <html lang="en">
- <head>
- <meta charset="UTF-8">
- <title>Contact form</title>
- </head>
- <body>
- <h1>Let's get in touch!</h1>
- <?php if (!empty($msg)) {
- echo "<h2>$msg</h2>";
- } ?>
- <form method="POST">
- <label for="name">Name: <input type="text" name="name" id="name"></label><br><br>
- <label for="email">Email: <input type="email" name="email" id="email"></label><br><br>
- <label for="message">Message: <textarea name="message" id="message" rows="8" cols="20"></textarea></label><br><br>
- <input type="submit" value="Send">
- </form>
- </body>
- </html>
Once the user submit his message, he will get a confirmation and the contents will arrive at the e-mail box entered in the addAddress field.
Pro Tip: In case the PHPMailer contact form does not work, add the following line to see what causes the issue: $mail->SMTPDebug = 2;
Don’t forget to remove it or set to zero once done!
PHPMailer offers extra examples that you can try in their official GitHub repository. Also, if you are using WordPress, you can easily create a contact form with the help of plugins.Don’t forget to remove it or set to zero once done!
Troubleshooting common PHP mail and PHPMailer errors
PHPMailer is quite an easy tool to master. But errors can occur from time to time. Let’s see the list of most common errors while sending PHP mail and how we can fix them.Sender address rejected: not owned by the user
The sender address rejected: now owned by user error means that the server was unable to authenticate using the provided details. To fix it, check the from headers and make sure they correspond to an existing e-mail box. If not, make sure to create or change it and the script will start executing. Lastly, make sure that your SPF record is enabled.Gmail couldn’t verify that example.com sent this message
If you see this warning when testing a PHP mail script, it could mean one of the following:- Your SPF record is not enabled. You may find the steps on how to create it here.
- The from header uses an e-mail address that does not exist or is not owned by you. Make sure to use valid SMTP authentication details.
Mail goes to the spam folder
There can be various reasons why a message can turn up in the spam box. Let’s see a few common ones:- Misleading or spammy subject. A few examples would be “Test“; “Hello“; “Testing“; “Urgent” or similar. Make sure that you set a clear intent in your message subject.
- Incorrect from headers often cause this. It’s a security measure to prevent e-mail spoofing and scams.
- You used spam trigger words. This category would include phrases as “great offer“; “click here“; “special promotion“; “this is not spam” and similar. Try changing up your message content to see if that’s the case.
- Your mailing list does not have an unsubscribe button. If enough people report your mails as spammy, then this is bound to happen. Having an unsubscribe button is a great way to avoid this.


0 comments:
Post a Comment